revolves around the principle that water and oil repel each other. The process i describe here involves printing directly from a limestone block. Lithography is derived from the Greek word "Lithos" - stone (or from stone), and is a very old and effective method of printing from a smooth surface to paper. However - in order to print effectively - the stone must be completely flat and totally smooth. Thus, before anything else, the stone must be grained, a process by which any previous image or "ghost" is removed from the face of the rock. This is done using a levigator - a heavy round tool which is spun across the surface of the stone after grain has been applied. The process is akin to sanding wood in that you start with a coarse grit and work your way to a fine dust - eventually polishing the surface. No scratches or rough spots can remain, as they will retain ink during printing.
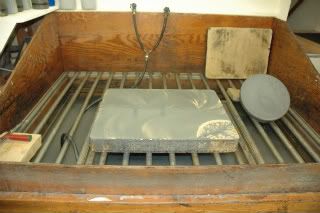
Here is a stone during graining. A small stone like this can take several hours to grain if it isn't flat. It must be absolutely flat or the contact press will miss areas of the drawing that are low.
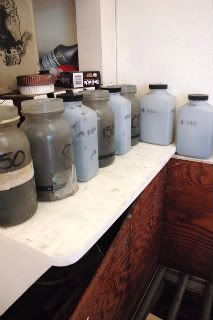
The grains run from 50 to 280, but the stones I have grained run through 60 to 80, 100, 150, 180, 200. It's a long process, but nothing is worse that getting almost finished and picking up a stray coarse grain on the levigator and scratching your rock. This means virtually starting over. At one point, I was assigned to grain several stones at 5:00 pm to be ready for Carroll Dunham at 8:00 the next morning. At the end of a work day this is the last thing you want to hear - but it is a reality of the print studio. So, putting a scratch in one of these at 9:00 pm would make me real sad.
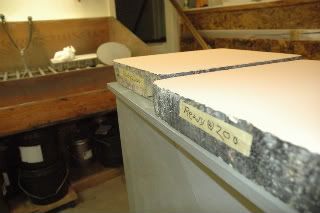
The stones are then marked and set aside for the artist. It generally takes much longer to grain the stone than it does to draw on it.
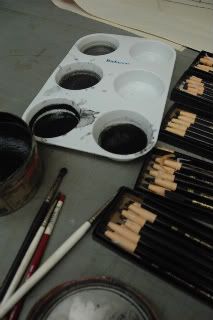
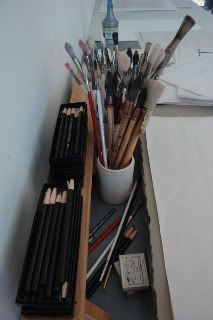
A drawing is done with either Litho crayons (a range of soft and hard, waxy drawing pencils), touche (a water soluble waxy paint, which applies like water color and acts as a resist to water) or a combination of both. You can achieve some really cool things with touche - which reticulates as it dries, making some really nice solid washes, which can be manipulated with crayons as well. The thicker you apply these elements the thicker the resist will be and the darker your image will appear.
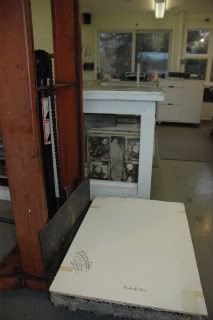
Moving these stones is a real pain - and sometimes they are just too heavy.
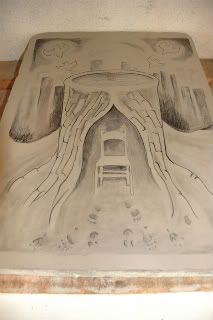
Here is my image. Before etching, talc and resin are dusted onto the stone to cause the ink to thicken. Some of the drawing is wiped away during etching - an important but difficult lesson. Regardless - the resist is so strong once applied that the subtleties re-emerge when inking. Drawing on these is fun - but you cannot erase. So be sure of your image and go gently. Here, gum has been applied to cool the etch, and preserve the stone while it is not in use.
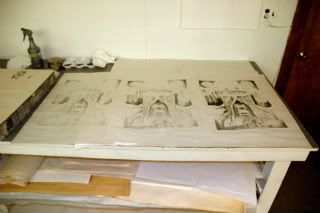
My print will likely be a one block, black and white image - though I could add drawings to include color stones or plates to be done on the offset press. the Carroll Dunham prints pictured below include several stones for each print. registering them gets tricky, especially because the stones are all different sizes, and some have multiple small drawings on them. Each is a different color and represents a different portion of the image. All these elements are matched up with the key drawing - or in this case the black part of the drawing that has the most information in it, which is printed onto a mylar. The mylar helps indicate where the paper must lay each time the image is printed so that all the images match up, and every sheet looks exactly the same as the original proof.
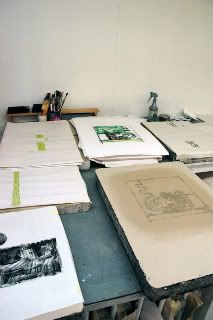
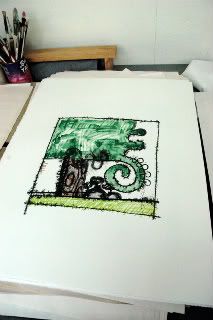
Each stone has a proof of the image covering it to protect the drawing and identify which part of the image is on which rock. All of these separate elements add up to make the final product, pictured right.
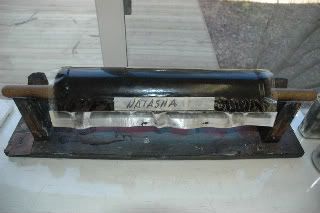
A leather roller is used on many stones to ensure that the image retains the maximum amount of ink without drying the surface of the stone. During inking, the stone must be wet enough to repel the oil based ink from every part of the stone that doesn't have pencil or touche on it.
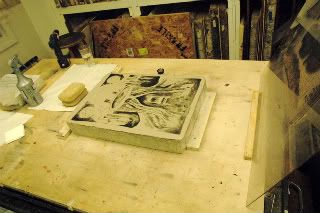
Here is the stone on the press, and after being inked to capacity. Asphaltum and tannic acid are used to cause the greasy drawing ares to retain ink effectively. The press bed beneath the stone must be totally clean - even a hair beneath the pressure of the contact press can cause a stone to crack. Inking lightly first, and then to heavy, the image comes up rather slowly.
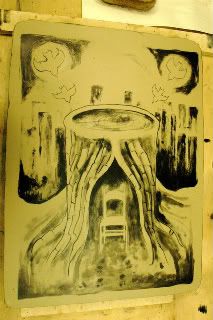
This stone is ready to run through the press, and have proofs pulled from it. It will darken as the the first several proofs are run, and then the amount of ink and pressure can be adjusted to best suit the image quality. Spot etching can be done to increase the amount of detail in reticulation or heavy wash areas. In this case only the very darkest parts of the image need to be re-etched. To add to the drawing, you can counter etch the stone and add more drawing - but aside from small sanding areas, drawn areas cannot be removed.
You can see the progression as the ink builds up on the stone. At this point - unless I decide to further alter the image, this stone is ready to run prints from.
If I ever get the opportunity, I would like to run a small edition of this print, as I am pretty happy with it considering it is my first attempt. Some areas are light - but overall it looks a lot like my drawing after being run on paper. It will darken further, and look much better on white paper. will include an image of this work when I have a decent proof of it - but here is a poor consolation prize:
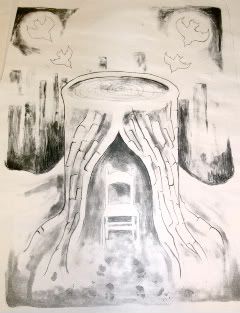
As I said - you must be persistent to get your own work done. Make it known from day one that you want to make prints and get started on them right away. I started week three, and this is as much as I've gotten done. You will need the help of printers to work in the studio - so buddy up. Otherwise, you will run errands and wash dishes the whole time - and it might not feel worth it.
I'm sure many have wondered why I haven't included any of my NYC adventures here, so that will be my next blog. Suffice it to say: I have done a lot, but could never do it all in four months. Plan things ahead of time! Make use of your weekends! Time Out NY is a great way to keep up with cool stuff going on in the city. Galleries and Museums are free - so that has been a bulk of my experience. More about that later.
No comments:
Post a Comment